Start a charge
Start a charge from the dashboard of a charger component. The charger must be in the same Profile as a Prohelion Battery Management Unit (BMU) with Control pack switched on (refer to Charger components).
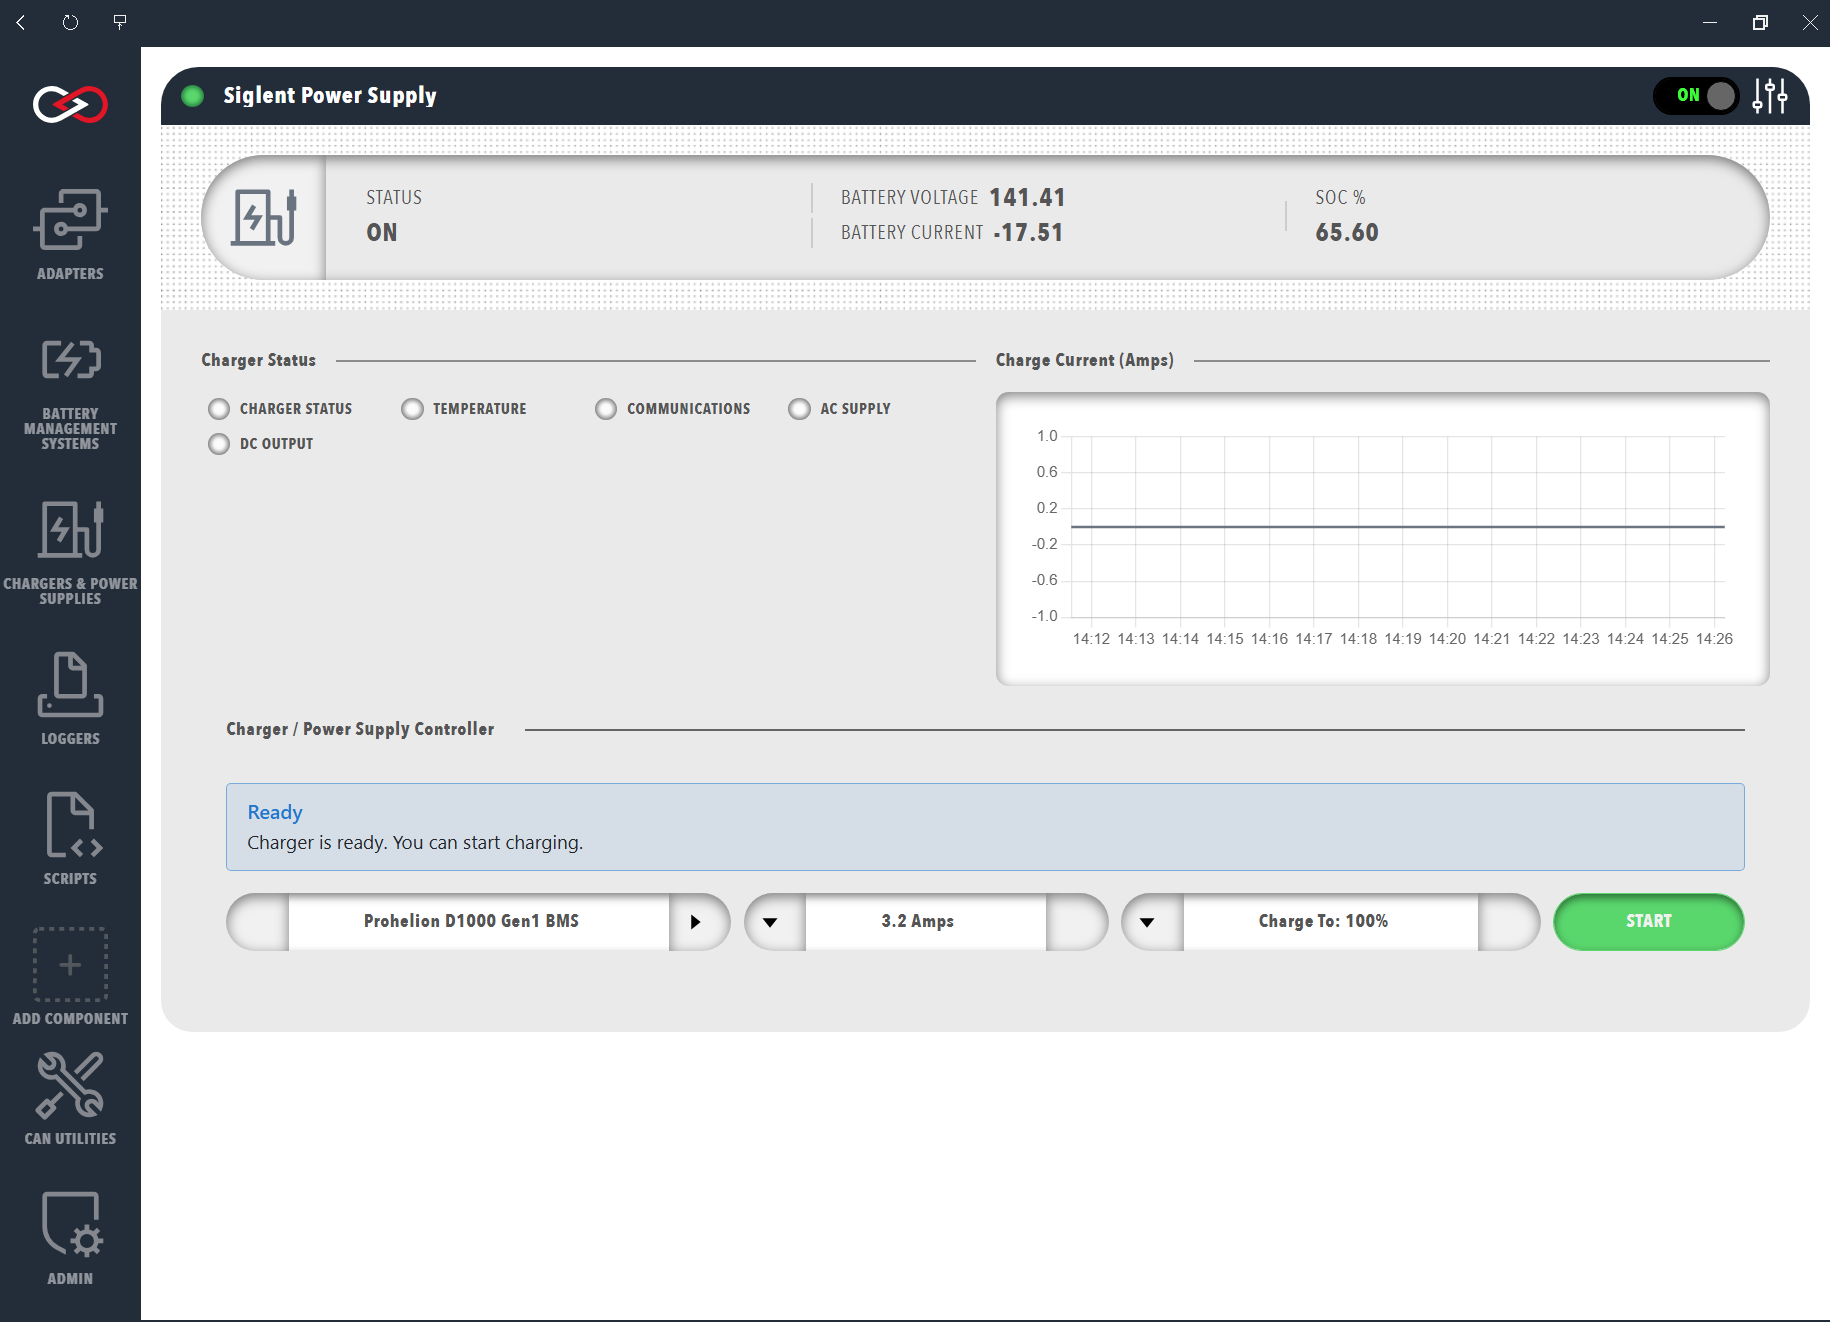
Open the charger from Chargers & Power Supplies. The dashboard shows:
- The Charger status lamps (CHARGER STATUS, TEMPERATURE, COMMUNICATIONS, AC SUPPLY, and DC OUTPUT).
- The Charge Current (Amps) chart.
- The Charger / Power Supply Controller panel, for a user with the Control charging permission.
With Auto connect off on a TDK or Siglent supply, connect the charger first (refer to Connections and reconnecting). Once it is connected, the message in the Charger / Power Supply Controller panel shows Ready with the text "Charger is ready. You can start charging."
The panel has four controls:
- The battery selector, which shows the battery's ID between two arrows, chooses which Prohelion BMU to charge when the Profile has more than one.
- The current control sets the charge current in amps, in steps of 0.5 A, up to the maximum the screen allows.
- Charge To sets the state of charge, in percent, at which charging stops.
- START begins the charge and becomes STOP while charging is running.
Set the supply and charge limits before a first charge, because a Supply current limit higher than the rating of the wall circuit can overload that circuit. Refer to Charger settings for the limits and the risks of setting them wrongly.
To start a charge, follow these steps.
- Select the battery to charge.
- Set the maximum charge current, at or below the cell manufacturer's charge limit.
- Set Charge To to the state of charge at which charging stops.
- Select START. The button changes to STOP.
- Check that the charge has started. The message in the panel shows Charging status with the charging current and voltage, for example "Charging at 5.0A • 280.4V • On". The DC OUTPUT lamp is green and the message ends with On, and the Charge Current (Amps) chart rises above zero. If the message stays on Ready or START returns, the charge has not started.
Selecting START engages the pack itself, so there is no separate step to close the contactors. Profinity runs these stages in order:
- Set the charger to the estimated pack voltage.
- Check that the charger is ready for precharge.
- Engage the pack through the BMU.
- Start the charge.
Selecting STOP stops the charger and disengages the pack.
Troubleshooting
| What you see | Cause | What to do |
|---|---|---|
| The message stays on Ready, or START returns | Profinity did not start the charge, because a start stage failed or the charger did not provide current within five seconds. | Read the Profinity log for the error that names the failed stage, fix that cause, then select START again. |
| The charge stops and the pack disengages without you selecting STOP | The battery management system or the charger goes into an error state, or stops reporting normally, during the charge. | Check the status of the battery management system and the charger, correct the fault, then select START again. Profinity stops the charge and disengages the pack. |