Managing users
Every person who signs in to Profinity through the Web or the API has a user account. The roles assigned to the account decide what that person can see and do. A role is a named set of permissions such as viewing tags, sending CAN messages, or editing profiles.
Setting up a new person means creating the account and choosing the role that matches their job. Roles and permissions describes the roles and the permissions inside them.
You manage users from Users & Groups. It needs the Security administration permission and a Server licence. Refer to Who can sign in, by installation type for which installations use user accounts.
Creating a new user
- Select ADMIN in the side menu, then Users & Groups.
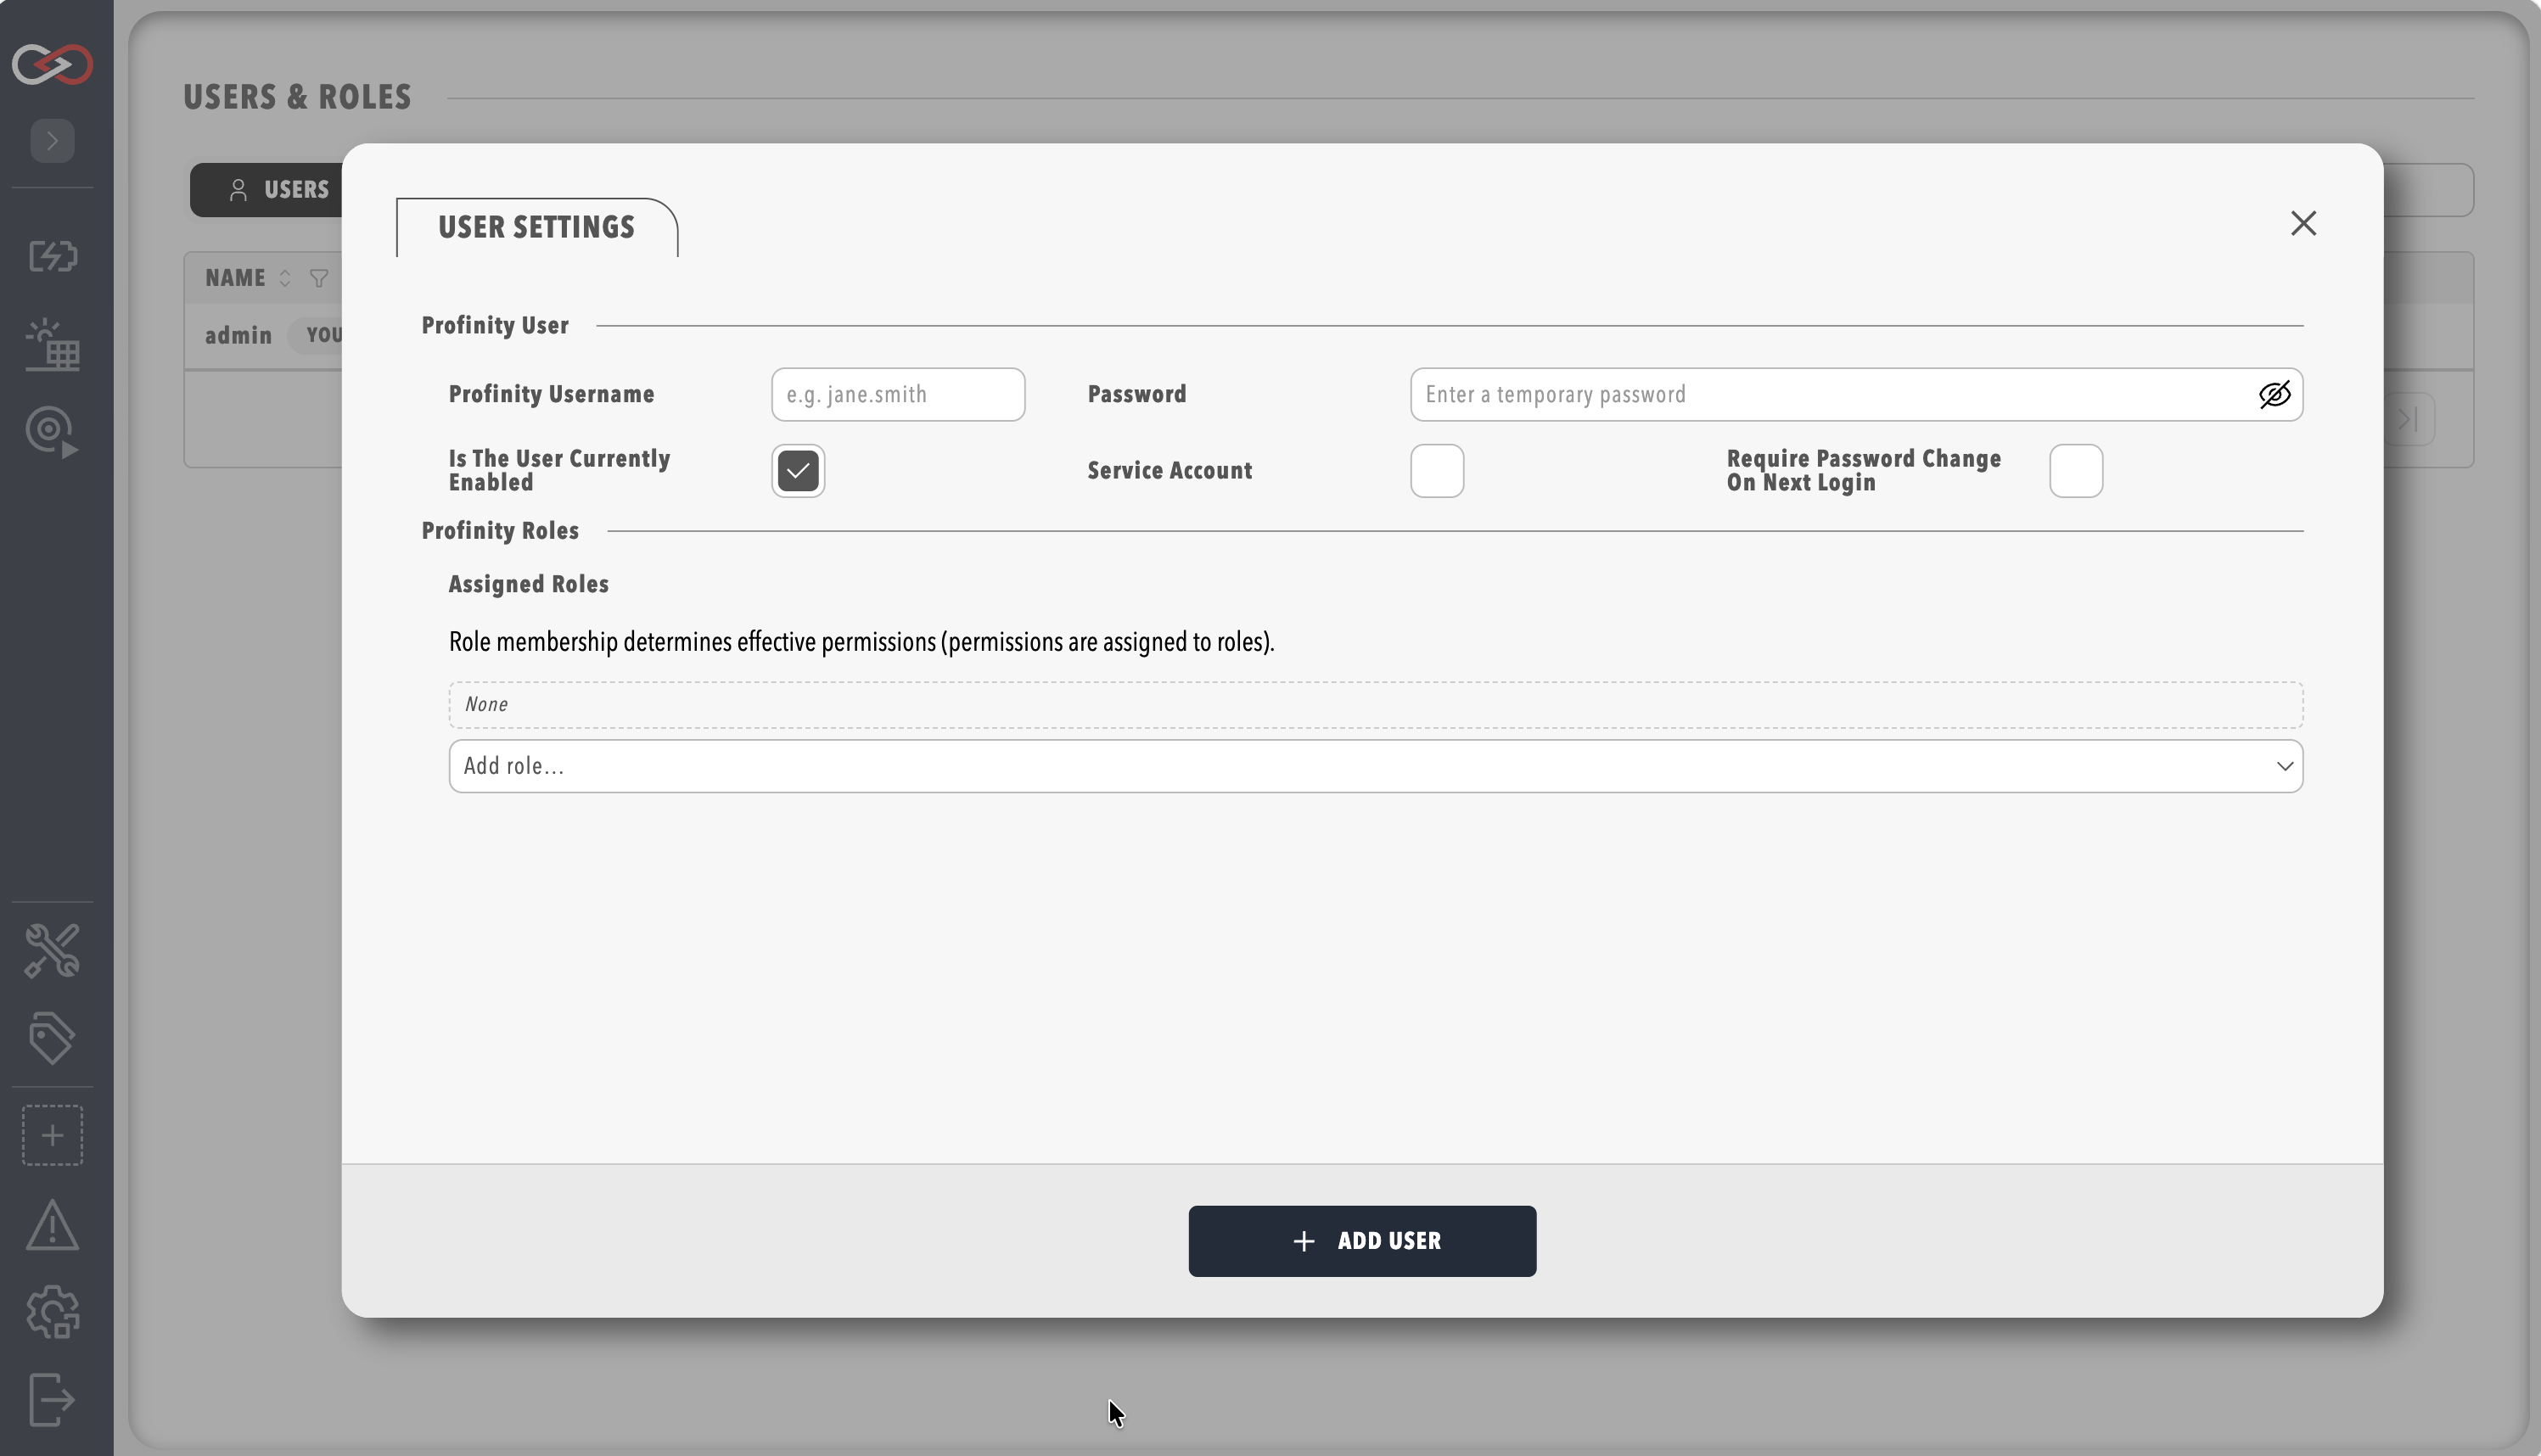
- Select Add user.
- Fill in the fields in the table that follows.
- Optionally choose one or more roles under Assigned roles, then select ADD USER. Profinity confirms with the message "Successfully created the user".
| Field | Type | Description | Default |
|---|---|---|---|
| Profinity username | Text | A unique name for the account, up to 256 characters, using only letters, numbers, periods, hyphens, underscores, and @. A name with any other character is rejected. |
None |
| Password | Secret | The initial password for local sign-in, which must meet the Password policy. When editing an existing user, leave it blank to keep the current password. | None |
| Is the user currently enabled | On or off | Only enabled users can sign in or use the API. Switching it off blocks a person's access without deleting the account. | On |
| Service account | On or off | Marks an account that exists for automation and produces a token that never expires, as described in Service accounts. | Off |
| Require password change on next login | On or off | Makes the person choose their own password the first time they sign in. | Off |
| Assigned roles | Choice | The roles that decide what the user can do. | None |
Sites that use single sign-on (SSO) create the user in the same way, then add an external identity link, as described in SSO and sign-in method.
Giving a user the right access
Each user holds the combined permissions of all their roles. Give each person one role that matches their job, and add a second role only when they have a second job.
Profinity provides a single built-in role, Administrators, which holds every permission and is assigned to the default admin account.
An administrator creates every other role from the Roles tab to suit the site.
Create a role explains how to build a role and suggests starting points, and Roles and permissions lists every permission.
Examples are a viewer role for people who only watch the system and a role for people who run it each day.
Because Administrators includes managing users and changing the system configuration, keep it for initial setup and emergencies. Named individuals use narrower roles the rest of the time.
To change the access of an existing user, select the user's row in Users & Groups to open their settings dialog, edit Assigned roles, then select SAVE. Profinity confirms with the message "Successfully updated the user".
Changing roles signs people out
Changing a user's Assigned roles ends that user's active sessions, and they must sign in again. Make the change when the person is not part-way through a task.
The same dialog contains a User Actions tab for the administrator tasks in the following table.
| Task | Where to find it |
|---|---|
| Require a user to choose a new password, and sign out their sessions | User Actions tab, then Reset Password. Refer to MFA account management |
| Clear a user's authenticator so they enrol again | User Actions tab, then Reset MFA. Refer to MFA account management |
| Create or view an API token for a service account | User Actions tab, then Generate Token or View Token. Refer to Service accounts |
| Link a user to an identity provider account | User Actions tab, in External identities (SSO). Refer to SSO and sign-in method |
Disabling a user
To stop a person signing in without deleting their account:
- Open the user's settings dialog.
- Switch off Is the user currently enabled.
- Select Save. Profinity shows 'Successfully updated the user'.
Switching off Is the user currently enabled and saving signs the user out of open sessions and stops new sign-ins. You do not need Reset Password for this. Changing the user's Assigned roles has the same effect.
Password and sign-in rules
The Password policy sets password length, age, and complexity for the whole site. Two-factor authentication describes how the second sign-in step is enabled and what users see. How long a sign-in lasts and when repeated failures lock a user out are set in Session policy and login lockout.
After creating a user
If the user signs in locally, share the sign-in details securely and enable Require password change on next login. The person then chooses their own password the first time.
Sign in as the new user, or ask them, to confirm that the side menu shows the entries expected for their roles. A missing entry almost always means a missing permission. The table in Roles and permissions shows which permission to check.
Change the default administrator password
Where an installation has the default admin account, its password is password, and the first sign-in forces a password change.
Choose a strong password at that point, and follow your organisation's policies when creating and sharing credentials.
Refer to Who can sign in, by installation type to check whether your installation has the account.
Related documentation
Troubleshooting
| What you see | Cause | What to do |
|---|---|---|
| "Username may only contain letters, numbers, periods, hyphens, underscores, and @" | The Profinity username contains a character that is not allowed | Change the name so that it uses only the allowed characters, then select Save. |
| "User account is disabled. Please contact an administrator." | Is the user currently enabled is switched off for the account | Open the user's settings dialog, switch on Is the user currently enabled, and select Save. |
| The person sees fewer entries in the side menu than expected | The account lacks a permission that the entry needs | Check the permission in Roles and permissions, then add it to a role the user holds. |