Update BMU configuration and firmware
Change the firmware configuration of a Prohelion Battery Management Unit (BMU), unlock its Admin parameters, or flash its firmware, from Change Settings on the BMU dashboard.
The steps differ by generation, which is part of the model you chose when you added the BMU, such as Prohelion D1000 Gen1 BMS or Prohelion D1000 Gen2 BMS:
- Gen1: the D1000 Gen1 and M48 Gen1. The C20 Gen1 has no firmware settings or firmware update in Profinity.
- Gen2: the D1000 Gen2, M48 Gen2, and C48 Gen2.
Before you begin:
- Add the BMU to a profile and check that it reports data, as described in Prohelion BMU.
- Changing settings needs the Modify components permission.
- Flashing firmware needs the Modify profiles and Allow firmware actions permissions, and the
.binfirmware file for your model. - Flashing a Gen1 BMU needs a CAN to Ethernet bridge in the profile, or a Prohelion Virtual CAN Bus Adapter together with another CAN adapter that carries the traffic. A Gen2 BMU can be flashed through the CAN adapter it already uses.
Change the BMU configuration
Wrong firmware settings can damage the pack
A setting that does not match the pack can allow unsafe voltages or currents. Change a value only when the configuration parameters page for your model describes its purpose. The BMU dashboard page links to the page for each model.
- Select Change Settings on the BMU dashboard.
- Keep a copy of the current settings. On a Gen2 BMU, select the Firmware Utilities tab, then select SAVE SETTINGS, and Profinity downloads the settings as a YAML file. On a Gen1 BMU, write down the current value of each setting that you plan to change.
- Select the Firmware Settings tab.
- Change the setting. Profinity writes each setting to the BMU as you change it.
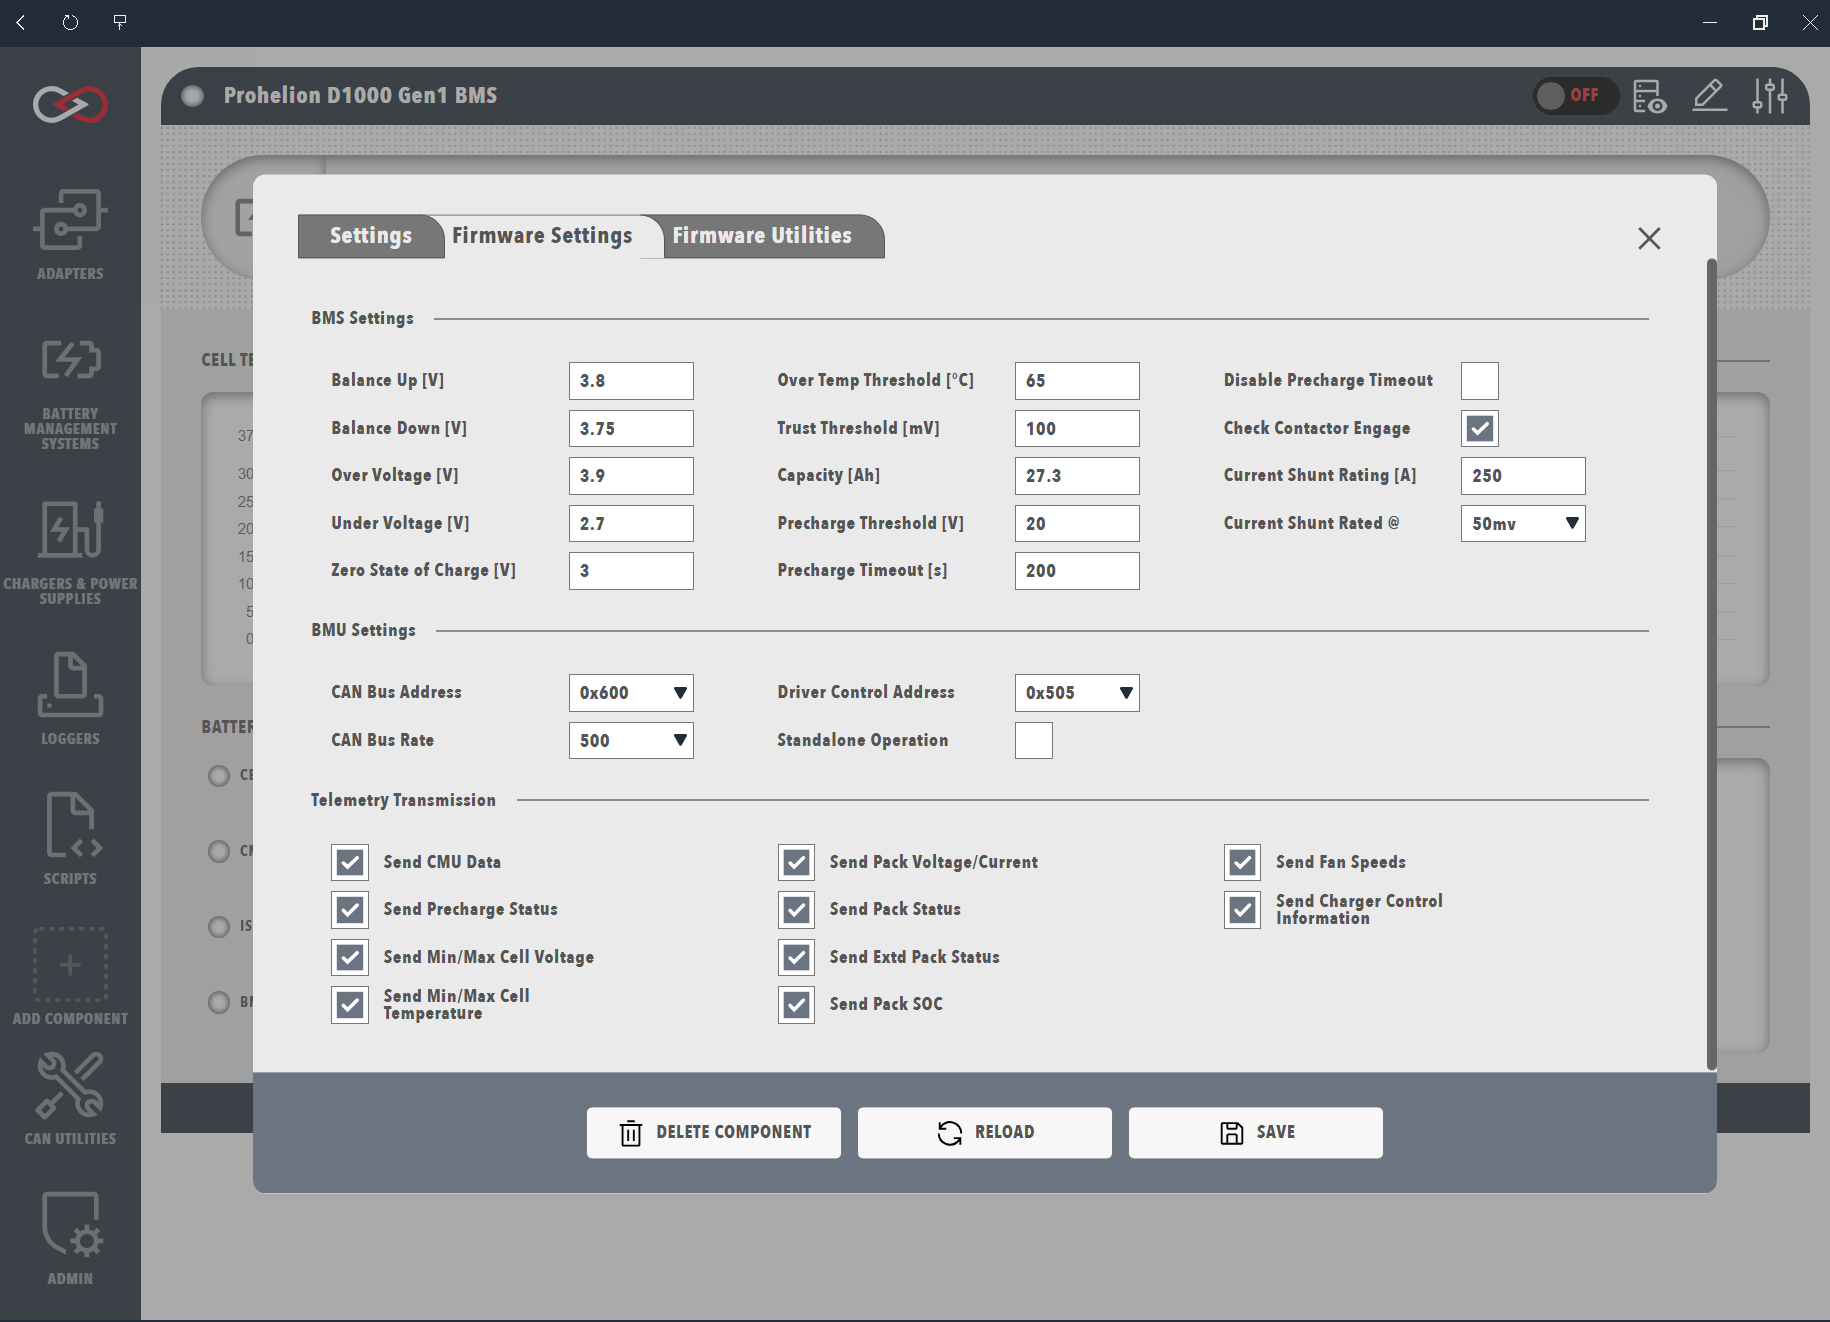
To check the change, open the Firmware Settings tab again and confirm that the setting shows the new value.
To return to the saved settings on a Gen2 BMU, select CLICK TO UPDATE FIRMWARE SETTINGS on the Firmware Utilities tab and choose the YAML file that you saved. On a Gen1 BMU, set each value back by hand.
Each D1000 Gen2 parameter has a User or Admin permission level, which the configuration parameters page for the model lists. The M48 Gen1 parameters are on its Software Specifications page.
Unlock the Admin firmware parameters
The D1000 Gen2, M48 Gen2, and C48 Gen2 show their Admin parameters only while a session unlock is active, and otherwise Profinity works at the User permission level. The unlock uses the Firmware configuration key, which is supplied with the product when it is purchased, because the key is not published. Profinity holds the key for your sign-in session only and never saves it to the profile.
- Select Change Settings on the BMU dashboard.
- On the Prohelion BMU settings tab, in the Firmware configuration key row, select Enter.
- Type the key in hexadecimal, with or without the
0xprefix, for example0x1A2Bor1A2B. The key is from0toFFFF, and digits with no prefix are read as hexadecimal, so10means 16. - In Session unlock timeout, set how long the session lasts, from 1 to 1440 minutes. The default is 30.
- Select Apply.
The dialog reloads and shows the Admin parameters. The row shows Session active, with the expiry time and the permission level that the key gives.
To enter a different key, select Change, and to end the session at once, select Clear. The session also ends when the timeout passes, when you sign out, and when Profinity restarts, and the Admin parameters then disappear from the dialog. Each signed-in user holds their own session.
Flash the BMU firmware
A firmware update cannot be undone
The update replaces the firmware on the BMU. The BMU keeps its stored settings, but on a Gen2 BMU save them first in step 3 so that you can restore them if you need to.
- Select Change Settings on the BMU dashboard.
- Select the Firmware Utilities tab.
- On a Gen2 BMU, select SAVE SETTINGS. Profinity downloads the current settings as a YAML file.
- In the Update Firmware field, upload the
.binfirmware file. - Select CLICK TO UPDATE FIRMWARE.
- In the dialog that warns that the update cannot be undone, select CLICK TO UPDATE FIRMWARE again. A progress indicator shows the update.
When the progress completes, check that the BMU dashboard shows data from the BMU again.
Profinity keeps the uploaded file in the firmware folder of the active profile, described in Profile folders.
For the M48 Gen1, the hardware manual's M48 Gen1 Firmware Update Procedure covers the CAN bus requirements in full.
Troubleshooting
| What you see | Cause | What to do |
|---|---|---|
| The Firmware Settings tab says Profinity is still loading the firmware values | Profinity has not finished reading the settings from the BMU. | Wait a few seconds, then refresh the dialog. On a Gen2 BMU, check that the Firmware configuration key is entered if you need the Admin parameters. |
| The Firmware Settings tab shows Error Loading Firmware | Profinity could not read the settings from the BMU. | Wait a few seconds, then refresh the dialog. If the error stays, read the reason on the Logs page under ADMIN. |
| The Firmware Settings tab is missing | Profinity has not received the BMU's firmware settings. | Check that the CAN adapter status is green, that Base address matches the BMU, and that the BMU is powered. |
| The firmware update stops with an error | No firmware file was uploaded, the file is not valid, or no suitable CAN adapter is active. On a Gen1 BMU, the log says the operation needs an adapter that supports a Transmission Control Protocol (TCP) connection. | Select the link in the error to read the logs. Upload the .bin file again, or add the bridge or adapter listed under the prerequisites, then start the update again. |